

A walk-in wet room is the most architecturally ambitious of the four shower configurations we cover in our Complete Guide to Custom Glass Shower Doors & Enclosures, and the one most often over-simplified in early design conversations. Homeowners tend to picture it as “a shower with no door,” as though removing the door is the entire decision.
In practice, a wet room also called a curbless walk-in shower, shifts nearly all of the water-management work a door and curb would normally handle onto three other elements instead: fixed glass placement, floor slope, and drain location. Get those three right and the room performs beautifully with a strikingly minimal footprint. Get any one of them wrong, and water finds the gap.
As we note in Chapter 2 of our Complete Guide to Custom Glass Shower Doors & Enclosures “One or more fixed (non-moving) glass panels define the shower zone without any door at all… It requires careful layout planning for water containment and is most successful in larger bathrooms with high shower heads and thoughtful slope-to-drain engineering.” This guide expands on exactly what that slope-to-drain engineering looks like in practice, how much fixed panel coverage a real wet room needs, where the floor has to fall, how a return panel does the job a door usually does, and how to know honestly whether your bathroom’s footprint can support the format at all.
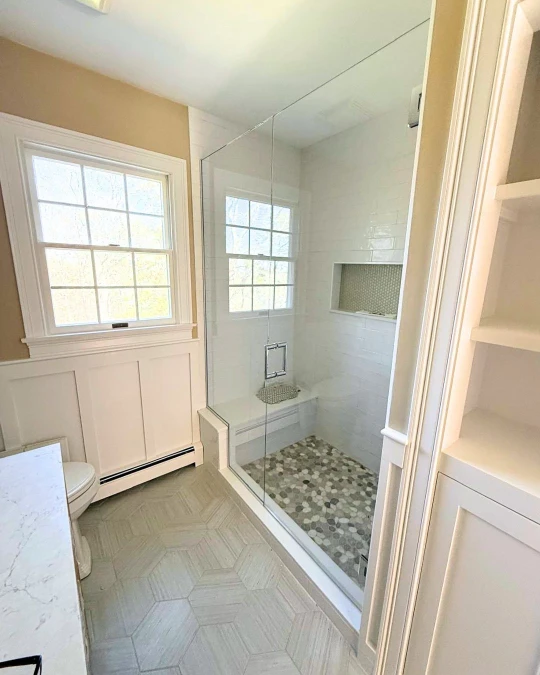
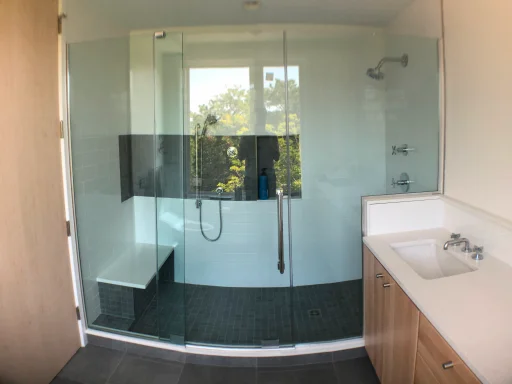
A walk-in wet room, a curbless walk-in shower uses one or two fixed glass panels instead of a full enclosure. There’s no door, so water containment depends entirely on panel placement, return-panel angling, and floor slope toward the drain. It’s the pillar guide’s own “European spa aesthetic” configuration, this guide covers exactly what “slope-to-drain engineering” means once you get past the phrase itself.
What Makes a Wet Room Different From a Standard Walk-In Shower?
A standard walk-in shower hinged, pivot, or sliding relies on a door, or a pair of overlapping glass panels, to physically block water inside a defined footprint that’s usually raised slightly above the surrounding floor by a curb or pan lip. A wet room removes both the door and the curb. The entire bathroom floor is waterproofed as a single continuous surface, gently sloped toward one drain, and the “shower zone” is defined visually rather than physically, typically by one or two fixed glass panels and a change in tile pattern, rather than a step up or a swinging door.
💧Quick Definition
A wet room is a bathroom where the entire floor not just a separate shower pan is waterproofed and gently sloped to a single drain, letting the shower zone be defined by fixed glass rather than a curb or door.
This is a meaningful engineering shift, not just an aesthetic one. In a hinged or sliding enclosure, if a door seal ages or a hinge sags slightly, the curb still catches most stray water it’s a second line of defense. In a wet room, there’s no curb to catch a mistake; the slope of the entire floor is the only line of defense that exists. That’s precisely why the pillar guide flags “thoughtful slope-to-drain engineering” as a requirement rather than a suggestion, and why we treat it as the first calculation in any wet room layout not a detail handled by the tile crew after the glass is already ordered.
Fixed Panel Placement: How Much Coverage Do You Actually Need?
The right amount of fixed glass depends on where the showerhead sits relative to the rest of the room, and how much spray radius actually needs to be contained. Across the Cape Cod primary bathrooms we fabricate for, three coverage patterns cover almost every layout.
🚿Single Return Panel
Most Compact
One fixed panel, positioned perpendicular to the shower wall at the edge of the wet zone. The panel “returns” toward the room, deflecting the direct spray while leaving the rest of the zone visually open.
- Panel Width: 24″–36″
- Containment Level: Moderate, tight slope tolerance
- Best Configuration: Single showerhead, corner zone
- Ideal Room Size: 40–60 sq ft
Best for: a single fixed showerhead positioned in a corner, where the return panel only needs to block spray traveling toward the vanity or toilet not an entire perimeter.
📐L-Shaped Two-Panel Corner
Our Most Common Spec
Two fixed panels meeting at 90°, wrapping the wet zone on two sides while leaving the remaining sides open toward the room. This is the configuration we specify most often for Cape Cod primary suites.
- Panel Width: Two panels, 30″–48″ each
- Containment Level: Strong, more forgiving of slope
- Best Configuration: Rainhead + handheld combo
- Ideal Room Size: 60–100 sq ft
Best for: larger primary baths with a rain head and handheld combination the extra panel coverage buys real tolerance if the floor slope is a fraction off true.
🌊Full-Length Fixed Screen
Spa Standard
One continuous panel spanning most or all of one wall, floor to ceiling, or floor to a header replacing an entire wall of the wet zone with glass while leaving one full side open as the entry.
- Panel Width: One panel, 60″+ span
- Containment Level: Depends entirely on slope accuracy
- Best Configuration: Spa-style suite, freestanding tub nearby
- Ideal Room Size: 100+ sq ft
Best for: generous primary suites where the glass itself is a design statement. Because the open perimeter is largest here, this is also the layout with zero margin for slope error, see the next section. A panel this size is also where an EnduroShield coating earns its keep fastest, since there’s no door to share the daily hard-water exposure.
Floor Slope & Drain Engineering, the Detail the Pillar Guide Flags
Every wet room floor needs a slope of at least 1/4″ per foot toward the drain, the same minimum most plumbing codes require for any shower pan. The difference is that a wet room has no curb to compensate for a slope that’s slightly off. This is the single technical detail most design conversations skip past, and it’s the one our pillar guide’s measurement chapter treats as non-negotiable for any curbless layout.
- Code Minimum – 1/4″ par foot: Minimum for any shower floor
- Our Wet Room Standard – 3/8″ par foot: No-curb layouts, verified pre-tile
Most wet rooms use a linear (trench) drain set along the open edge of the wet zone, rather than a central point drain because a linear drain only needs the floor to pitch in one direction, toward a single line, instead of pitching evenly toward a center point from every direction. That single-direction pitch is easier to tile accurately and far more forgiving of the small dimensional variation every custom bathroom floor has.
❌ Flat or Reverse-Sloped Floor
Water Migrates Into the Room
A floor poured level, or sloped even slightly away from the drain, lets water creep past any fixed panel and onto the surrounding floor the single most common wet room failure we’re called in to remediate.
✓ Engineered Slope-to-Drain
Water Stays Where It Belongs
A floor laser-measured and sloped a consistent 3/8″ per foot toward a linear drain, verified before tile is set, keeps water inside the wet zone regardless of exactly where the fixed panel sits.
📏Verified Before the Glass Is Cut
As detailed in Chapter 5 of our Complete Guide Why Precision Measurement Is the Non-Negotiable Step we confirm floor slope with the same laser measurement tools we use for glass fabrication, because a wet room’s slope has to be verified before the glass is ever ordered, not after it’s installed.
Return Panels: Deflecting Water Without a Door
A return panel does the job a shower door usually does it just does it by deflection instead of by sealing. Three details determine whether it actually works:
- Panel width matched to spray radius, not door convention – Return panels are sized to the showerhead’s actual spray pattern rather than a standard door width typically 24″–36″, occasionally up to 42″ for a rain head mounted close to the panel.
- Panel angle – The large majority of return panels are set perpendicular (90°) to the fixed wall panel. An angled return, closer to 75°–85°, can redirect deflected water back toward the drain rather than straight out into the room worth discussing if your showerhead sits near the panel’s edge.
- The gap at the floor is intentional – Return panels are hung with a structural clip at the floor, not sealed to it a 1/4″–3/8″ gap is normal and expected. The floor slope, not a seal, is what keeps water from crossing that gap.
Taken together, panel placement and return-panel angle are what let a wet room look almost invisible from the doorway while still doing real containment work but neither one substitutes for the floor slope underneath it. They work together, not instead of each other.
Structural Considerations for Wall-Mounted Fixed Panels
Fixed panels carry no hinge load, but they’re not lightweight. A floor-to-ceiling panel in 1/2″ tempered glass, anchored with a U-channel or wall clamps, still concentrates real weight and lateral force from a hand bracing against the glass, from a wall-mounted rain arm, or simply from the panel’s own mass onto a small number of anchor points.
⚙️The Same Rule As Frameless Doors
As covered in Chapter 4 of our Complete Guide Hardware Finishes & Architectural Details, any hardware carrying 80–100 lbs of tempered glass must anchor into structural wall studs or solid blocking, not just tile and drywall. Fixed panels are no exception simply because they don’t swing.
For new construction or a full gut remodel, we coordinate blocking placement with your builder before tile goes up see our companion reference, Structural Blocking for Glass Hardware: A Builder’s Reference, for the specifics. Thickness matters here too: a full-length screen at 1/2″ carries meaningfully more load than the same panel at 3/8″, which is worth weighing against the coverage decision in the section above our Glass Thickness guide breaks down when the upgrade is worth it.
Is a Wet Room Right for Your Bathroom Size?
Square footage is the honest first filter, before glass, hardware, or tile ever enter the conversation. Here’s how we advise clients based on the room they’re actually working with.
| Bathroom Size | Recommended Configuration | Wet Room Fit |
|---|---|---|
| Under 40 sq ft | Curbed or semi-frameless enclosure | Not generally recommended |
| 40–60 sq ft | Single Return Panel wet room | Feasible with careful showerhead placement |
| 60–100 sq ft | L-Shaped Two-Panel Corner | Our most common Cape Cod primary-bath spec |
| 100+ sq ft | Full-Length Fixed Screen, tub adjacent | Full spa-style luxury configuration |
🏛️The Glass House Recommendation
Below roughly 40 square feet, the floor simply doesn’t have enough area to build in slope tolerance without creating an awkward pitch elsewhere in the room. In those cases, we typically recommend a curbed or semi-frameless enclosure instead, a wet room forced into too small a footprint tends to disappoint rather than delight.
A well-executed wet room is one of the clearest expressions of the “European spa aesthetic” our pillar guide describes but it’s earned through floor engineering most homeowners never see, not through the glass alone. If you’re weighing a curbless walk-in shower against a more traditional frameless enclosure, revisit our Complete Guide to Custom Glass Shower Doors & Enclosures for how this configuration compares to hinged, pivot, and sliding doors.